Monday, March 26, 2018

ASP.Net Core 2 with Postgresql on Linux Part 4: Sync Configuration Differences


In In Part I, I discussed the rationale for porting a ASP.Net Core 2 app to my Linux system replacing SQL Server with Postgresql and place it on Heroku. In Part II, we transferred the SQL Server data to Postgres.

In Part III, I create the ASP.Net MVC Core 2.x app, from which we will proceed, and get Entity Framework Core installed.

Next, in Part IV, I look at the configuration differences between the ASP.Net MVC app that uses SQL Server and the new app, in preparation of porting the old app to use Postgresql.

First, let's look at the existing app's project file and compare that to the one that we have in our new app that use Postgresql. Of course, in order to do that we will need the code from the app using SQL Server. To do that, I cloned my existing Windows based ASP.Net MVC .Net Core project onto my Linux system as I will be reusing a good deal of the code moving forward. Here is what I did (For more information see: https://git-scm.com/book/en/v2/Git-Basics-Getting-a-Git-Repository):


 $mkdir WinCoreProject  
 $cd WinCoreProject  
 $git clone https://myUserName@bitbucket.org/myUserName/myASPNetCoreApp.git  

Now that we have the code from the existing app, let's compare the two project's config files, which are in the root directory of each projects' folder. 

One of my favorite tools for this task is a multi-platform, data comparison utility called Beyond Compare. Comparing the two project files, here is a look at the differences.


Note the text in red in the right side of the view. This shows that the old app's configuration includes three additional settings. The NetCore.MailKit entry is for a MailKit extension for asp.net core that I use to send a confirmation email to users who want to create a user account. Serilog is a logging library with many nice features. In addition, we see the Serilog.Sinks.RollingFile package setting that allows for a daily log file entries.

To sync the two files, let's continue with Beyond Compare. Select the yellow arrows in the right pane to move the text to the config file displayed in the left pane.


Then, to update the myApp.csproj file, select the disk icon to the right of the project file name.


Here is the view of the synced files:


Next, run the dotnet restore command at the command prompt to install the packages:

$dotnet restore   

Note that you can also install the packages at the command prompt in the application's root directory:  
 $dotnet add package NETCore.MailKit

Per the location here, "The dotnet add package command provides a convenient option to add a package reference to a project file. After running the command, there's a compatibility check to ensure the package is compatible with the frameworks in the project. If the check passes, a <PackageReference> element is added to the project file and dotnet restore is run." 

Visual Studio Code, with the C# extension, will also assist you when you update the project file. 


In the next post, Part V, we will start comparing the differences in both the projects' structures and porting the existing project code, starting with the data model layer, to the new project.


Friday, March 23, 2018

ASP.Net Core 2 with Postgresql on Linux Part 3: Create the ASP.Net MVC Core 2.x app and Install Entity Framework Core

In Part I, I discussed the rationale for porting a ASP.Net Core 2 app to my Linux system replacing SQL Server with Postgresql and place it on Heroku. As I thought about it, my first logical step was to port the data from SQL Server to Postgresql. While I think I am proficient at the command prompt, I had to admit that having a GUI based tool would be a help. Having used pgAdmin on a Rails 3.x project, that is where I leaned. In that article I show the steps to installing pgAdmin, a GUI Postgresql client on Ubuntu 16.04. In Part II, we transferred the SQL Server data to Postgres.

In this post, I create the ASP.Net MVC Core 2.x app, from which we will proceed, and get Entity Framework Core installed.

First, I created a new ASP.Net MVC .Net Core C# project in Visual Studio Code (see https://docs.microsoft.com/en-us/aspnet/core/tutorials/first-mvc-app-xplat/start-mvc for more).

 $mkdir myApp  
 $cd myApp  
 $dotnet new mvc  

I already had the .NET Core 2.0.0 SDK, Visual Studio Code, and the VS Code C# extension on my Ubuntu 16.04 Linux system. See https://docs.microsoft.com/en-us/aspnet/core/tutorials/first-mvc-app-xplat/start-mvc for more information on these steps.


Then, I issued a dotnet run to build and execute the source code:


Per the URL provided in Visual Studio Code screen above, I browsed to http:/localhost:5000:


OK, so the app will build and load.

Next, I updated the project file in Visual Studio Code (myApp.csproj) to include the following settings to install Entity Framework Core:

 <Project Sdk="Microsoft.NET.Sdk.Web">  
  <PropertyGroup>  
   <TargetFramework>netcoreapp2.0</TargetFramework>  
  </PropertyGroup>  
  <ItemGroup>  
   <PackageReference Include="Microsoft.AspNetCore.All" Version="2.0.5" />  
   <PackageReference Include="Npgsql.EntityFrameworkCore.PostgreSQL" Version="2.0.0" />  
  </ItemGroup>  
  <ItemGroup> 
    <DotNetCliToolReference Include="Microsoft.VisualStudio.Web.CodeGeneration.Tools" Version="2.0.2" />  
    <DotNetCliToolReference Include="Microsoft.EntityFrameworkCore.Tools" Version="2.0.0" />  
    <DotNetCliToolReference Include="Microsoft.EntityFrameworkCore.Tools.DotNet" Version="2.0.0" />  
  </ItemGroup>  
 </Project>  

Then, I ran the dotnet restore command to install the above EF package and tools:

 $dotnet restore  


Now we have a working ASP.Net MVC Core 2.0 app with Entity Framework Core installed.

Next, in Part IV, I look at the configuration differences, in preparation of porting my existing app to use Postgresql.


Tuesday, March 20, 2018

ASP.Net Core 2 with Postgresql on Linux Part 2: Move SQL Server Data to Postgres

In Part I, I discussed  the goal of porting my ASP.Net Core 2 app to my Linux system using  Postgresql as the database and placing it on Heroku. As I thought about it, my first logical step was to port the data from SQL Server to Postgresql.

While I think I am proficient at the command prompt, I had to admit that having a GUI based tool would be a help. Therefore, Part I details the setup of pgAdmin installed on my Ubuntu system.

Here, in Part II we port the existing SQL Server data to Postgres.

First, I looked around for a free tool to take an existing MS SQL database and transfer it to a Postgresql database. However, what I found did not seem to meet my goal. Given the disparity between the Db platforms, the best tool I could find was a Postgresql function entitled convert_mssqlddl2pgsql.sql. Since I had existing MS SQL Create Table scripts already, this seemed the best option.

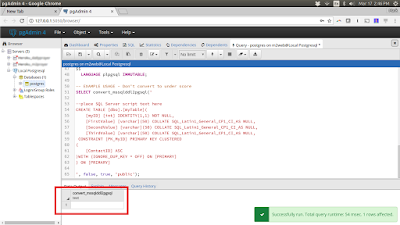
In short, I loaded the convert_mssqlddl2pgsql script into pgAdmin and added my MS SQL Create Table script (for each existing table, one at a time) as the input parameter (see below), and the output was a Postgres Create Table script.


Here is the SQL for the SQL Server table
 CREATE TABLE [dbo].[myTable](  
   [myID] [int] IDENTITY(1,1) NOT NULL,  
   [FirstValue] [varchar](50) COLLATE SQL_Latin1_General_CP1_CI_AS NULL,  
   [SecondValue] [varchar](50) COLLATE SQL_Latin1_General_CP1_CI_AS NULL,  
   [ThirdValue] [varchar](50) COLLATE SQL_Latin1_General_CP1_CI_AS NULL,  
  CONSTRAINT [PK_MyID] PRIMARY KEY CLUSTERED   
 (  
   [ContactID] ASC  
 )WITH (IGNORE_DUP_KEY = OFF) ON [PRIMARY]  
 ) ON [PRIMARY]  
re is the Data Output from pgAdmin function above:


 create table public.mytable(  
   myid serial not null,  
   firstvalue varchar(50) null,  
   secondvalue varchar(50) null,  
   thirdvalue varchar(50) null,  
  constraint pk_myid primary key   
 (  
   myid  
 )   
 )                  

After running the pgAdmin function for each SQL Server database table and then running the script in pgAdmin to create the Postgres database tables, I made sure that the sequence columns were set accordingly. To do this I ran the following for each table with a serial id column:

 UPDATE public.mytable SET myid=nextval('mytable_myid_seq');  

You can use pgAdmin to check the serial id columns to may sure that the default value property of the column is set to the next available value.


The next step was to get the data from the MS SQL database tables into the newly formed Postgresql tables. What I did was to get a record-by-record text file output of the SQL Server table from a select statement that consisted of the table values.
 'Your first column value here', 'Your second column value here...','and you guest it....your third column here!'  
 'Your first column value here again', 'Your second column value here..yeah...','and your third column here!'  
 'Your first column value here, one more time', 'Your second value','your third column!'  

Now that I had the SQL Server table data into a fixed length format, the next step was to transform it into proper Postgres insert statements.

Mind you, I know that I could have used a SQL select statement within SQL Server to create the Postgres insert statements, but given that I have been a Ruby fan from way back and reading in and parsing files is one of the strengths of Ruby, the next step was a natural evolution, or at least some kind of semi-intelligent design...I used the Ruby script below to produce the Postgres insert scripts.

 file = File.open("myValues.txt", 'r')  
 while !file.eof?  
   line = file.readline  
   puts "INSERT INTO public.tableName(firstColumn, secondColumn, thirdYouGuestItColumn) VALUES ( " + line + ");"  
 end  

The output was the following:

 INSERT INTO public.myTable(  
      firstvalue, secondvalue, thirdvalue)  
      VALUES ('Your first column value here', 'Your second column value here...', 'and you guest it....your third column here!');  
 INSERT INTO public.myTable(  
      firstvalue, secondvalue, thirdvalue)  
      VALUES ('Your first column value here again', 'Your second column value here..yeah...', 'and your third column here!');  
 INSERT INTO public.myTable(  
      firstvalue, secondvalue, thirdvalue)  
      VALUES ('Your first column value here, one more time', 'Your second value', 'your third column!');  

Just as before, I ran the above script in the pgAdmin client. The result was Postgresql tables with data!

In short, these are the steps that took place with each table.

Now that my data is in Postgresql, the next step, to be detailed in Part III, I create the ASP.Net MVC Core 2.x app, from which we will proceed, and get Entity Framework installed.


Thursday, March 15, 2018

ASP.Net Core 2 with Postgresql on Linux Part 1: Installing pgAdmin4 on Ubuntu 16.04

For the last 15 years I have had a personal web-based app that I have used to learn new languages and frameworks. 

Starting with Microsoft's .Net 2.0 framework and then moving from Ruby on Rails 3.x, to MeteorJS, and then to .Net Core 1.x, this app has also been used with MySql, SQL Server, MongoDb, and Postgresql as the data access layer. 

Currently, I have ported the app to ASP.Net Core 2 with SQL Server on the Azure cloud. As I was poking around my github repo I thought why not use my Linux Ubuntu 16.04 laptop and port the current ASP.Net Core 2 app to my Linux with Postgresql and place it on Heroku

As I thought about it, my first logical step was to port the data from SQL Server to Postgresql. While I think I am proficient at the command prompt, I had to admit that having a GUI based tool would be a help. Having used pgAdmin on my Rails 3.x project, that is where I leaned. So, step one, get pgAdmin installed on my Ubuntu system. 

Thanks to the data from https://askubuntu.com/questions/831262/how-to-install-pgadmin-4-in-desktop-mode-on-ubuntu, this was a much easier transition. 

Here is what I did:

Installed pgAdmin4 using Python3.x (I preferred to avoid encoding related issues):
 $sudo apt-get install virtualenv python3-pip libpq-dev python3-dev  
 $cd  
 $virtualenv -p python3 pgadmin4  
 $cd pgadmin4  
 $source bin/activate  
 $pip3 install https://ftp.postgresql.org/pub/pgadmin/pgadmin4/v2.1/pip/pgadmin4-2.1-py2.py3-none-any.whl  
 $gedit lib/python3.x/site-packages/pgadmin4/config_local.py  

Copied this to the config_local.py file:
 import os  
 DATA_DIR = os.path.realpath(os.path.expanduser(u'~/.pgadmin/'))  
 LOG_FILE = os.path.join(DATA_DIR, 'pgadmin4.log')  
 SQLITE_PATH = os.path.join(DATA_DIR, 'pgadmin4.db')  
 SESSION_DB_PATH = os.path.join(DATA_DIR, 'sessions')  
 STORAGE_DIR = os.path.join(DATA_DIR, 'storage')  
 SERVER_MODE = False  

Created the following directories and change the permissions:
 $sudo mkdir "/var/log/pgadmin"  
 $sudo chmod a+wrx "/var/log/pgadmin"  
 $sudo mkdir "/var/lib/pgadmin"  
 $sudo chmod a+wrx "/var/lib/pgadmin"  

Created a file in my /home/mark folder named pgAdmin4.py and copy this to the file (note that your user name will be the folder here):
 #!/bin/bash  
 cd ~/pgadmin4  
 source bin/activate  
 python3 lib/python3.5/site-packages/pgadmin4/pgAdmin4.py  

Made the file executable:
 $chmod +x /home/mark/pgAdmin4.py  

Then, I installed postgres locally. First I created the file /etc/apt/sources.list.d/pgdg.list, and added a line for the repository:
 deb http://apt.postgresql.org/pub/repos/apt/ xenial-pgdg main  

I imported the repository signing key, and update the package lists:
 $wget --quiet -O - https://www.postgresql.org/media/keys/ACCC4CF8.asc | \  
  sudo apt-key add -  
 $sudo apt-get update  

Next, I installed PostgreSQL on Ubuntu, using the apt-get (or other apt-driving) command:
 $apt-get install postgresql  

Finally, after the install of postgresql, I created a user and give them permissions:
 $su -s  
 $su - postgres  
 $psql  
 postgres=# CREATE USER yourUser PASSWORD 'userPassword';  
 postgres=# GRANT ALL ON SCHEMA test TO yourUser;  
 postgres=# GRANT ALL ON ALL TABLES IN SCHEMA test TO yourUser;  
 postgres=# \q  

Now, when I run the ./pgAdmin.py command from a terminal and navigate to http://127.0.0.1:5050/browser/ in my web browser, I see the following:

In Part 2, I will detail the process of moving the data from SQL Server to Postgresql.

Thursday, March 08, 2018

Selling Out has been Amazing!


I have been delving into the world of Docker and Containers on both Linux and Microsoft Windows. I was listening to a podcast that recommended the Youtube video, "Containers aka crazy user space fun" that records Jessie Frazelle's keynote at Linux Conf in Australia. At about 1:50 into the video she stated, "who am I?...I work at Microsoft...selling out has been amazing!" There was laughter from this Linux crowd and she continued on to give a great and informative talk on Linux Containers. Typically, selling out is a bad thing and Jessie Frazelle obviously did not mean it in a negative way. On a side note I love that Microsoft loves Linux and I am sure that has resulted in a great working experience for Jessie. Contrary to the populist view that all corporations are evil, this goes to show that companies can...and some do change.